Common Passport Photo Mistakes and How to Avoid Them
Published on April 15, 2025
Introduction
Passport and visa applications can be time-consuming, expensive, and occasionally stressful processes. The last thing anyone wants is to have their application delayed or rejected due to an improper photo. Yet, according to statistics from various passport agencies worldwide, photo-related issues are among the top reasons for application rejections.
The consequences of submitting an incorrect passport photo extend beyond simple inconvenience. Rejected applications can lead to postponed travel plans, additional application fees, and the stress of rushing to correct the error before deadlines. In some cases, especially for time-sensitive visa applications, a rejected photo could mean missing important events, business opportunities, or carefully planned vacations.
In this comprehensive guide, we'll explore the most common passport photo mistakes that lead to rejections and provide detailed guidance on how to avoid each pitfall. Whether you're applying for a new passport, renewing an existing one, or seeking a visa for international travel, understanding these common errors will help ensure your application process proceeds smoothly.
The Impact of Photo Rejections
Before diving into specific mistakes, let's consider the scope of this issue:
- According to the U.S. Department of State, approximately 200,000 passport applications are rejected annually due to photo-related issues, representing about 18% of all application rejections.
- The UK Passport Office reports that improper photos account for over 50,000 delayed applications each year.
- For visa applications to countries with strict photo requirements like Canada, China, and Australia, photo rejections can exceed 30% of all document-related rejections.
- The average delay caused by a photo rejection is 2-3 weeks for passport applications and can be even longer for certain visa applications.
These statistics highlight the importance of getting your passport photo right the first time. The good news is that most photo rejections are entirely preventable once you understand the common pitfalls.
Mistake #1: Incorrect Size and Dimensions
One of the most frequent reasons for passport photo rejections is submitting a photo with incorrect dimensions or improper proportions. Each country has specific size requirements for passport photos, and deviations from these standards—even by a few millimeters—can lead to rejection.
Common Size-Related Errors:
- Overall Photo Size: Using standard photo sizes instead of the specific dimensions required for passport photos.
- Head Size Proportion: Having the head too large or too small within the frame.
- Face Positioning: Centering the face incorrectly within the photo.
- Print Scaling: Printing at incorrect dimensions or allowing printer settings to automatically resize the image.
Essential Size Requirements by Country:
- United States: 2 × 2 inches (51 × 51 mm) with head height between 1 inch and 1 3/8 inches (25-35 mm)
- United Kingdom: 45 mm high × 35 mm wide with head height between 29 mm and 34 mm
- European Union: Generally 35 mm × 45 mm with face height about 70-80% of the vertical dimension
- Canada: 50 mm wide × 70 mm high with head height between 31 mm and 36 mm
- Australia: 35 mm × 45 mm with head height between 32 mm and 36 mm
How to Avoid Size Mistakes:
- Research Requirements: Always check the exact specifications for your destination country or document type before taking or printing photos.
- Use Templates: Utilize sizing templates or tools like Passport Photo Wiz that automatically format your photo to the correct dimensions.
- Measure Precisely: Use a ruler to verify the dimensions of printed photos before submitting them.
- Professional Printing: When using commercial printing services, specify exactly that these are passport photos and provide the required dimensions.
- Disable Auto-Scaling: When printing at home, ensure your printer settings don't automatically resize the image.
Mistake #2: Improper Background
Background issues are another major cause of passport photo rejections. The background must be uniform, of the correct color, and free from patterns, shadows, or other people/objects.
Common Background Errors:
- Wrong Color: Using a background color that doesn't comply with requirements (e.g., using white for UK photos which require light grey or cream).
- Textured or Patterned Background: Using wallpaper or textured walls instead of a smooth, uniform surface.
- Shadows on Background: Shadows cast by the subject or improper lighting creating uneven background appearance.
- Visible Objects: Other people, furniture, or objects visible in the background.
- Uneven Lighting: Inconsistent lighting causing the background to appear darker in some areas.
Background Requirements by Country:
- United States: Plain white or off-white background
- United Kingdom: Plain light grey or cream background (not white)
- European Union: Light grey, cream, or off-white background (varies by country)
- Canada: Plain white or light-colored background
- Australia: Plain light grey or off-white background
How to Avoid Background Mistakes:
- Use Proper Materials: A clean, wrinkle-free sheet or photography background paper of the correct color.
- Distance from Background: Stand at least 2-3 feet away from the background to prevent casting shadows.
- Even Lighting: Ensure the background is evenly lit without hot spots or shadowed areas.
- Digital Correction: Use tools like Passport Photo Wiz to digitally replace or correct background issues if necessary.
- Verification: Check the final photo carefully to ensure no patterns, textures, or objects are visible in the background.
Mistake #3: Improper Lighting and Exposure
Lighting problems can render a passport photo unusable, even if all other aspects are correct. Both overexposed and underexposed photos can cause rejections, as can uneven lighting that creates shadows or obscures facial features.
Common Lighting Errors:
- Harsh Shadows: Strong directional lighting causing shadows on the face or background.
- Overexposure: Too much light washing out facial features or creating glare.
- Underexposure: Insufficient lighting making the photo too dark or details difficult to discern.
- Red-Eye: Flash photography causing the red-eye effect.
- Uneven Lighting: Different light sources creating inconsistent lighting across the face.
Lighting Requirements:
- Even Illumination: The face should be evenly lit with no harsh shadows.
- Natural Skin Tone: Lighting should not alter the natural color of skin.
- No Shadows: Particularly, no shadows under the eyes, on the background, or created by glasses frames.
- No Glare or Reflections: Especially on glasses or from jewelry.
- Proper Contrast: Clear distinction between the subject and background without excessive contrast.
How to Avoid Lighting Mistakes:
- Use Diffused Natural Light: Take photos near a large window with indirect sunlight, which provides even, natural lighting.
- Multiple Light Sources: When using artificial lighting, use multiple sources positioned to eliminate shadows.
- Avoid Direct Flash: Direct flash often creates harsh shadows and can cause red-eye.
- Use Reflectors: Simple white cardboard or aluminum foil can be used to bounce light and fill in shadows.
- Test Before Final Photo: Take test shots to check lighting and adjust as needed before the final photo.
Mistake #4: Inappropriate Expression and Pose
Your facial expression and head position in a passport photo must meet specific guidelines. One of the most common mistakes is smiling or having an expression that deviates from the required neutral look.
Common Expression and Pose Errors:
- Smiling or Exaggerated Expressions: Any expression other than neutral can cause rejection.
- Closed Eyes or Squinting: Eyes must be fully open and clearly visible.
- Tilted Head: Head must be straight, not tilted to either side or forward/backward.
- Not Looking Directly at Camera: Eyes must be directed at the camera, not looking away.
- Hair Covering Face or Eyes: Hair should not obscure any part of the face, especially the eyes.
Expression and Pose Requirements:
- Neutral Expression: A natural, relaxed face with closed mouth and no smile is required.
- Eyes Open: Eyes must be fully open, but not widened unnaturally.
- Direct Gaze: Looking straight at the camera.
- Head Centered and Straight: Head should be centered in the frame and not tilted.
- Both Ears Visible: Some countries require both ears to be visible (unless covered for religious reasons).
How to Avoid Expression and Pose Mistakes:
- Practice Your Expression: Practice a neutral expression in a mirror before taking the photo.
- Multiple Takes: Take several photos to ensure at least one has the perfect expression.
- Use a Mirror: Place a mirror behind the camera so you can check your expression before the photo is taken.
- Hair Management: Secure hair away from your face and eyes before taking the photo.
- Posture Check: Sit up straight with shoulders level and facing directly toward the camera.
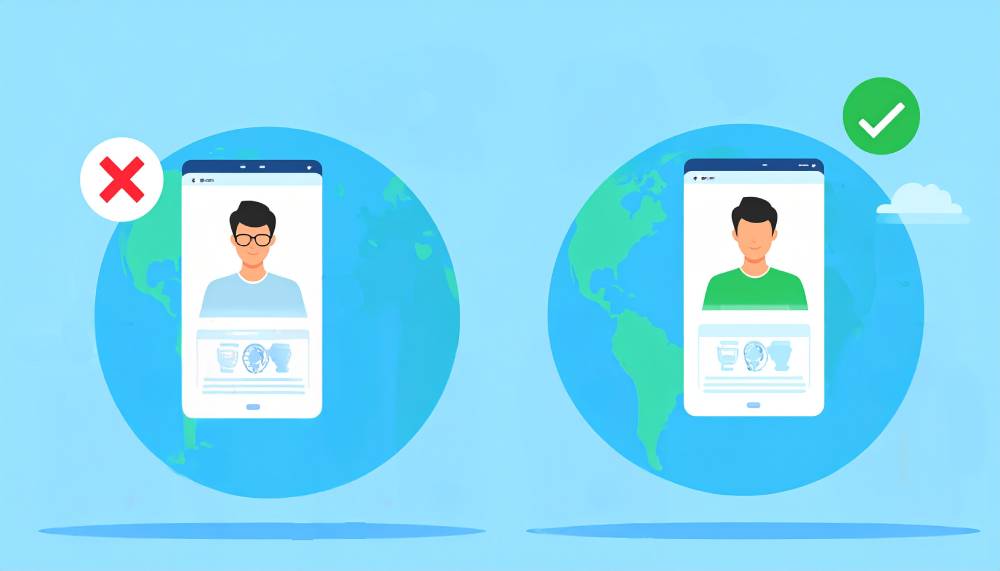
Mistake #5: Eyeglasses and Head Coverings Issues
Rules regarding eyeglasses and head coverings in passport photos have become stricter in recent years, leading to many rejections for photos that would have been acceptable in the past.
Common Eyeglasses and Head Covering Errors:
- Wearing Glasses When Not Permitted: Some countries now prohibit glasses entirely in passport photos.
- Glare or Reflection on Glasses: Light reflecting off glasses lenses or frames.
- Tinted or Transitional Lenses: Any tint that obscures eye visibility is not allowed.
- Heavy Frames: Glasses frames that are too thick or obscure the eyes.
- Non-Religious Head Coverings: Hats, caps, or other non-religious head coverings are not permitted.
- Religious Head Coverings Obscuring Features: Even when permitted for religious reasons, head coverings must not cast shadows or obscure facial features.
Current Regulations by Country:
- United States: As of November 1, 2016, glasses are not allowed in passport photos except in rare cases with a medical certificate.
- United Kingdom: Glasses are permitted only if they cannot be removed for medical reasons, and there must be no glare.
- Canada: Glasses are permitted if they don't obscure the eyes and there's no glare or reflection.
- Australia: Glasses are generally not accepted unless worn for medical reasons with a certificate.
- All Countries: Religious head coverings are generally permitted but must not cast shadows on the face or obscure facial features.
How to Avoid Eyeglasses and Head Covering Mistakes:
- Remove Glasses: Unless medically necessary, it's generally safest to remove glasses for passport photos.
- Adjust Lighting for Glasses: If glasses must be worn, use diffused lighting and angle glasses slightly downward to minimize glare.
- Religious Head Coverings: Ensure they are positioned to reveal the full face from bottom of chin to top of forehead and from ear to ear.
- Medical Documentation: If glasses are medically necessary, obtain proper documentation to submit with your application.
- Check Specific Requirements: Some countries have very specific guidelines about head coverings, so verify the exact requirements.
Mistake #6: Poor Photo Quality and Resolution
Even if all other aspects of your passport photo are correct, poor image quality can still lead to rejection. This includes issues with resolution, focus, printing quality, and digital artifacts.
Common Quality Issues:
- Low Resolution: Photos that are pixelated or lack detail due to low resolution.
- Out of Focus: Blurry or soft-focus images that don't clearly show facial features.
- Poor Printing Quality: Streaks, lines, or other printer artifacts on physical photos.
- Compression Artifacts: Digital distortions from excessive image compression.
- Color Distortion: Unnatural color reproduction affecting skin tone.
- Physical Damage: Creases, folds, or other physical damage to printed photos.
Quality Requirements:
- High Resolution: Clear, detailed image with no pixelation.
- Sharp Focus: All facial features must be clearly defined and in focus.
- Professional Printing: Photos should be printed on high-quality photo paper with professional-grade printers.
- Natural Color: Accurate color reproduction, especially for skin tones.
- No Digital Artifacts: No visible compression issues, noise, or digital distortions.
How to Avoid Quality Mistakes:
- Use Quality Equipment: Take photos with a good quality camera or smartphone with adequate resolution.
- Proper Focusing: Ensure the camera is correctly focused on the face before taking the photo.
- Stability: Use a tripod or stable surface to prevent camera shake and blurring.
- Quality Printing: Use a photo-quality printer or professional printing service.
- Minimal Compression: When saving digital photos, use minimal compression to preserve quality.
- Physical Handling: Handle printed photos carefully to avoid creases, fingerprints, or other damage.
Mistake #7: Digital Alterations and Filters
In the age of smartphone photography and image editing apps, it's tempting to enhance or touch up passport photos. However, any noticeable alteration or use of filters is strictly prohibited and will result in immediate rejection.
Common Digital Alteration Errors:
- Skin Smoothing: Using filters or editing to remove blemishes, wrinkles, or imperfections.
- Color Enhancement: Adjusting colors to enhance appearance or skin tone.
- Red-Eye Removal: Even common corrections like red-eye removal can be grounds for rejection.
- Digital Background Replacement: Improperly replacing backgrounds can be detectable and lead to rejection.
- Feature Alteration: Any editing that changes natural facial features.
Permitted Digital Adjustments:
While most alterations are prohibited, some minor adjustments may be acceptable:
- Minor Brightness/Contrast Adjustments: Subtle adjustments to ensure proper exposure.
- Cropping: Adjusting the composition to meet dimension requirements.
- Professional Background Replacement: When done properly and undetectably, some application systems allow this.
How to Avoid Digital Alteration Mistakes:
- Resist Beautification: Avoid the temptation to "improve" your appearance with filters or editing.
- Focus on Original Quality: Invest time in taking a good original photo rather than fixing issues in editing.
- Use Specialized Tools: If adjustments are necessary, use passport photo-specific tools like Passport Photo Wiz that make only permitted adjustments.
- Proper Lighting: Good lighting in the original photo eliminates the need for many adjustments.
- Seek Professional Help: For important applications, consider professional passport photo services that understand the restrictions.
Mistake #8: Submission-Related Mistakes
Even with a perfect passport photo, errors in the submission process can lead to rejection or delays.
Common Submission Errors:
- Outdated Photos: Submitting photos that are older than the allowed timeframe (typically 6 months).
- Incorrect Number of Photos: Not including the required number of identical photos with the application.
- Digital File Format Issues: For online submissions, using the wrong file format, size, or resolution.
- Improper Attachment: Photos not properly attached to the application or falling off during processing.
- Written Marks or Damage: Photos that have been written on, stamped, or damaged after printing.
Submission Requirements by Type:
- Physical Applications:
- Photos must be printed on photo-quality paper
- Photos should not be damaged, marked, or creased
- Proper attachment according to application instructions
- Correct number of identical copies (typically 2)
- Digital Submissions:
- Correct file format (typically JPEG)
- Appropriate file size (usually 240KB-1MB)
- Minimum resolution requirements (typically 600x600 pixels)
- Proper color profile (sRGB)
How to Avoid Submission Mistakes:
- Check Recency: Ensure photos were taken within the required timeframe (usually 6 months).
- Count Verification: Double-check that you're including the correct number of identical photos.
- Gentle Handling: Handle printed photos by the edges to avoid fingerprints or damage.
- Proper Attachment: Follow exact instructions for attaching photos to applications.
- Digital Specifications: For online submissions, verify the exact file format, size, and resolution requirements.
How Tools Like Passport Photo Wiz Can Help
With so many potential pitfalls, using specialized tools designed specifically for passport photos can significantly increase your chances of success. Passport Photo Wiz and similar services offer several advantages:
- Country-Specific Templates: Automatic formatting to the exact dimensions required by different countries.
- Head Size and Positioning: Guidance for proper head placement and size within the frame.
- Background Correction: Tools to create a perfectly uniform, compliant background.
- Appropriate Adjustments Only: Making only the adjustments that are permitted while avoiding prohibited alterations.
- Digital and Print Optimization: Formatting for both digital submission and proper printing.
- Up-to-Date Requirements: Regular updates to reflect changing passport photo regulations.
These tools can significantly reduce the risk of rejection by eliminating many of the common mistakes we've discussed.
Conclusion
Passport and visa photo rejections can cause significant delays, additional expenses, and unneeded stress in your travel plans. By understanding and avoiding the common mistakes outlined in this guide, you can greatly increase your chances of a smooth application process.
Remember these key principles:
- Always check the most recent requirements for your specific destination or document type
- Pay careful attention to dimensions, lighting, background, expression, and image quality
- Resist the urge to digitally enhance or alter your appearance
- Consider using specialized tools like Passport Photo Wiz to ensure compliance
- When in doubt, seek professional assistance rather than risking rejection
With proper preparation and attention to detail, you can create perfect passport photos that will sail through the application process, allowing you to focus on planning your travels rather than dealing with bureaucratic setbacks.
Create Perfect Passport Photos Every Time
Take the guesswork out of passport photos with our free online tool. Passport Photo Wiz helps you create perfectly compliant photos for any country in just minutes.
Try Passport Photo Wiz Now